Friday, May 15, 2020

ADF table -Horizontal/Vertical Scrollbar issue


Requirement:We often come across requirement where we don't want any horizontal or vertical scrollbar for af:table/ADF table

Solution:

I am using HR DB schema department table and have created view object and Entity Object based on department table .My UI code looks like below when i dragged  view object on page as table.Note I have changed columnStretching="last" and autoHeightRows="20"


when i run page it  looks like this with Horizontal and Vertical scrollbar and there is space empty on right of the table.


Now lets get rid of Vertical Scrollbar first which very simple .We need to use  scrollPolicy="page"   attribute on af:table and table looks like below. Other way is to increase value for autoHeightRows="20" which result in longer table vertically .for now i have added scrollPolicy="page" which is needed in most cases.


Now interesting part is horizontal scrollbar is still there and there is no need for it.To get rid of horizontal scrollbar we need to add styleClass="AFStretchWidth" on af:table. After that now table looks like below.


  1. In above screenshot both horizontal and vertical scrollbar are gone but table occupies full page width.We may not want to table to occupy full page width .In this case give width="50%" on af:table and table looks like below.
  2. Please note here i have given width in percentage if you give something like width="500" then horizontal scrollbar will still appear.
  3. Please note you can not give width too small in percentage  that it can't cover the columns table ,which will ultimately result in horizontal scrollbar.

If your table is having more columns then tune the width % up-to 100.


Final af:table code looks like below


Sunday, March 22, 2020

ADF -Showing processing request popup for long running service calls/DB queries

Requirement-Sometimes we have requirement in our application/portal that when use clicks on any link or button we call service or DB Queries/DB update that takes usually more than 10 seconds to execute and in this case you want to show some user friendly processing or waiting popup rather than spinning mouse cursor.

what it also does is it prevents user to do any other action on screen until current request is completed


Solution :

Below is my sample screen and on click of search i want to show processing request popup to user until button action business logic execution  is completed


My jspx code looks like below

on lcik of search i am calling java script function enforcePreventUserInput which internally adds busy state listener and shows popup until the business logic execution is completed.

<?xml version='1.0' encoding='UTF-8'?>
<jsp:root xmlns:jsp="http://java.sun.com/JSP/Page" version="2.1"
          xmlns:f="http://java.sun.com/jsf/core"
          xmlns:h="http://java.sun.com/jsf/html"
          xmlns:af="http://xmlns.oracle.com/adf/faces/rich">
  <jsp:directive.page contentType="text/html;charset=UTF-8"/>
  <f:view>
    <af:document id="d1">
    <af:resource type="javascript">
            function enforcePreventUserInput(evt){                
                 var popup=AdfPage.PAGE.findComponentByAbsoluteId('p1');
                 if(popup!=null){
                    AdfPage.PAGE.addBusyStateListener(popup,handleBusyState);
                    evt.preventUserInput();
                 } 
            }
            
            //Javascript callback event handler
            function handleBusyState(evt){
              
                  var popup=AdfPage.PAGE.findComponentByAbsoluteId('p1');
                  popup.show();
                  if(popup!=null){
                      if(evt.isBusy()){
                          popup.show();
                      }
                      else if(popup.isPopupVisible()){
                          popup.hide();
                          AdfPage.PAGE.removeBusyStateListener(popup,handleBusyState);
                      }
                  }
             }            
    </af:resource>
      <af:form id="f1">
        <af:popup id="p1" contentDelivery="immediate">
          <af:dialog id="pt_d1" type="none">
            <af:panelGroupLayout halign="center" layout="vertical" id="pt_pgl2">
            
              <af:image source="/images/spinning-wheel_normal.gif"
                        shortDesc="System Busy" id="pt_i1"/>
                        <af:outputText value="Processing your request.."></af:outputText>
            </af:panelGroupLayout>
          </af:dialog>
        </af:popup>
        <af:spacer height="50"></af:spacer>
        <af:panelFormLayout>
        <af:inputText label="Employee Number "></af:inputText>
        <af:inputText label="Employee Name "></af:inputText>
        <af:commandButton text="Search" id="cb1"
                          actionListener="#{ManagedBean.actionListenerMethod}">
          <af:clientListener method="enforcePreventUserInput" type="action"/>
        </af:commandButton></af:panelFormLayout>
      </af:form>
    </af:document>
  </f:view>
</jsp:root>

In java Managed bean action listener i simply added sleep for 10 seconds for demonstration purpose as below.

    public void actionListenerMethod(ActionEvent actionEvent) {
        // Add event code here...
        try {
            //business logic which takes 10 seconds
            Thread.sleep(10000);
        } catch (InterruptedException e) {
        }
    }


On click of search UI looks like below for 10 seconds.


Friday, March 20, 2020

ADF Printable view of page

Requirement-Common requirement in web application is to have printable view page for user.

How it works?

Inside adf commandlink or adf commandButton you can use <af:showPritablePageBehaviour/> tag as shown in below
<af:commandLink text="Print"
                                     id="cl2" >
                          <af:showPrintablePageBehavior  />
                         

 </af:commandLink> 

Scenario 1

if you dont want to show certain links in printable view user below render condition to hide that in printable view.


#{adfFacesContext.outputMode!='printable'}

Scenario 2

In many of the scenarios we come across requirement where we dont want to show header and footer in print preview and only jsff content should be shown in print view.
In this case

when we click on print button framework walks up the component tree, starting with the component that is the parent to the af:showPrintablePageBehavior  tag, until it reaches a panelSplitter or a panelAccordion or the root of the tree (whichever comes first). The tree is rendered from there. Additionally, certain components that are not needed in print version (such as buttons, tabs, and scrollbars) are omitted.


for example my page is having jspx with threecolumnLayout Template and inside jspx there is taskflow region as below.

when you click on print only paragraph in center should be printed or shown in print view.so trick here is to use panelSplitter inside your jsff fragment  as shown in below


my jspx code looks like below

<?xml version='1.0' encoding='UTF-8'?>
<jsp:root xmlns:jsp="http://java.sun.com/JSP/Page" version="2.1"
          xmlns:f="http://java.sun.com/jsf/core"
          xmlns:h="http://java.sun.com/jsf/html"
          xmlns:af="http://xmlns.oracle.com/adf/faces/rich">
  <jsp:directive.page contentType="text/html;charset=UTF-8"/>
  <f:view>
    <af:document id="d1">
      <af:form id="f1">
        <af:pageTemplate viewId="/oracle/templates/threeColumnTemplate.jspx"
                         id="pt1">
          <f:facet name="center">
            <af:region value="#{bindings.taskflowdefinition1.regionModel}"
                       id="r1"/>
          </f:facet>
          <f:facet name="header"></f:facet>
          <f:facet name="end"></f:facet>
          <f:facet name="start">
            <af:outputText value="This is left menu"
                           inlineStyle="font-size:30px;font-weight:300;"></af:outputText>
          </f:facet>
          <f:facet name="branding"/>
          <f:facet name="copyright"/>
          <f:facet name="status"/>
        </af:pageTemplate>
      </af:form>
    </af:document>
  </f:view>

</jsp:root>

taskflowdefinition1 has jsff which looks like below


<?xml version='1.0' encoding='UTF-8'?>
<jsp:root xmlns:jsp="http://java.sun.com/JSP/Page" version="2.1"
          xmlns:af="http://xmlns.oracle.com/adf/faces/rich"
          xmlns:f="http://java.sun.com/jsf/core"
          xmlns:c="http://java.sun.com/jsp/jstl/core"
          xmlns:h="http://java.sun.com/jsf/html">
  <af:panelSplitter orientation="horizontal" splitterPosition="0" id="ps1"
                    disabled="true" firstBorder="all" secondBorder="all"
                    dimensionsFrom="children"
                    inlineStyle="background-color:White; border-width:0px; border-style:solid; border-color:white; padding-right:0px;">
    <f:facet name="first"></f:facet>
    <f:facet name="second">
      <af:panelGroupLayout layout="vertical">
        <af:commandLink text="Print" inlineStyle="font-size:14px;"  id="cl2">
          <af:showPrintablePageBehavior/>
        </af:commandLink>
        <af:spacer height="10"></af:spacer>
        <af:panelGroupLayout>
        <af:outputText value="this is large para for testing print preiew page.this is large para for testing print preiew page.this is large para for testing print preiew page.this is large para for testing print preiew page.this is large para for testing print preiew page.this is large para for testing print preiew page.this is large para for testing print preiew page.this is large para for testing print preiew page.this is large para for testing print preiew page.this is large para for testing print preiew page.this is large para for testing print preiew page.this is large para for testing print preiew page.this is large para for testing print preiew page.this is large para for testing print preiew page.this is large para for testing print preiew page.this is large para for testing print preiew page.this is large para for testing print preiew page.this is large para for testing print preiew page.this is large para for testing print preiew page.this is large para for testing print preiew page.this is large para for testing print preiew page.this is large para for testing print preiew page.this is large para for testing print preiew page.this is large para for testing print preiew page.this is large para for testing print preiew page.this is large para for testing print preiew page.this is large para for testing print preiew page.this is large para for testing print preiew page.this is large para for testing print preiew page.this is large para for testing print preiew page.this is large para for testing print preiew page.this is large para for testing print preiew page.this is large para for testing print preiew page.this is large para for testing print preiew page.this is large para for testing print preiew page.this is large para for testing print preiew page.this is large para for testing print preiew page.this is large para for testing print preiew page.this is large para for testing print preiew page.this is large para for testing print preiew page.this is large para for testing print preiew page.this is large para for testing print preiew page.this is large para for testing print preiew page.this is large para for testing print preiew page.this is large para for testing print preiew page.this is large para for testing print preiew page.this is large para for testing print preiew page."
                     inlineStyle="font-size:14px;"   id="ot1"/>
        <af:outputText value="this is large para for testing print preiew page.this is large para for testing print preiew page.this is large para for testing print preiew page.this is large para for testing print preiew page.this is large para for testing print preiew page.this is large para for testing print preiew page.this is large para for testing print preiew page.this is large para for testing print preiew page.this is large para for testing print preiew page.this is large para for testing print preiew page.this is large para for testing print preiew page.this is large para for testing print preiew page.this is large para for testing print preiew page.this is large para for testing print preiew page.this is large para for testing print preiew page.this is large para for testing print preiew page.this is large para for testing print preiew page.this is large para for testing print preiew page.this is large para for testing print preiew page.this is large para for testing print preiew page.this is large para for testing print preiew page.this is large para for testing print preiew page.this is large para for testing print preiew page.this is large para for testing print preiew page.this is large para for testing print preiew page.this is large para for testing print preiew page.this is large para for testing print preiew page.this is large para for testing print preiew page.this is large para for testing print preiew page.this is large para for testing print preiew page.this is large para for testing print preiew page.this is large para for testing print preiew page.this is large para for testing print preiew page.this is large para for testing print preiew page.this is large para for testing print preiew page.this is large para for testing print preiew page.this is large para for testing print preiew page.this is large para for testing print preiew page.this is large para for testing print preiew page.this is large para for testing print preiew page.this is large para for testing print preiew page.this is large para for testing print preiew page.this is large para for testing print preiew page.this is large para for testing print preiew page.this is large para for testing print preiew page.this is large para for testing print preiew page.this is large para for testing print preiew page."
                 inlineStyle="font-size:14px;"       id="ot2"/>
      
        </af:panelGroupLayout>
        <af:spacer height="10"></af:spacer>
          <af:commandButton text="Ok" id="cb1"/>
      </af:panelGroupLayout>
    </f:facet>
  </af:panelSplitter>

</jsp:root>

print view looks like below when clicked on print link


Conclusion :Use ADF panelspliter component to limit the print view to go further up to header and template.


Wednesday, March 4, 2020

Passing parameters to ADF popup at runtime

Requirement 
we often come across requirement of displaying help text on hover over of image or displaying different data on click of each row of ADF table.
As a example I am going to demonstrate how to display different help text in popup note window  on hover over of icon/image.

I have two field first name and email address  as shown in below.


Requirement is when user hover overs each of the question mark icon i want to display helptext as below
First Name -help text is ->First name must be at least 1 and no more than 31 letters long (no numbers). The only special characters accepted are -, ', &, ., and #.

Email Address help text is ->E-mail address needs to be in the following format: xx@xx.xxx

there may be more than two field like 10 fields on UI and you dont want to have 10 popups to display the help text

Solution

Step 1:Define client attribute

Inside each image tag we will have af:clientAttribute  tag with name and value as text we want to display to user.Inside af:image for popup display af:showPopupBehavior  tag will come to display popup on hover
Code will look like below

 <af:panelGroupLayout layout="horizontal">
          <af:inputText label="First Name" id="it20" autoSubmit="true"></af:inputText>
          <af:image source="/images/helpicon.png">
            <af:showPopupBehavior triggerType="mouseOver" align="endAfter"
                                  popupId="helpPopup"/>
            <af:clientAttribute name="helpText"
                                value="First name must be at least 1 and no more than 31 letters long (no numbers). The only special characters accepted are -, ', &amp;, ., and #."></af:clientAttribute>
          </af:image>
        </af:panelGroupLayout>
        <af:panelGroupLayout layout="horizontal">
          <af:inputText label="Email Address" id="it1" autoSubmit="true"></af:inputText>
          <af:image source="/images/helpicon.png">
            <af:showPopupBehavior triggerType="mouseOver" align="endAfter"
                                  popupId="helpPopup"/>
            <af:clientAttribute name="helpText"
                                value="E-mail address needs to be in the following format: xx@xx.xxx"></af:clientAttribute>
          </af:image>
        </af:panelGroupLayout>

Step2->reading the client attribute and using it inside popup

In our popup tab we need to have launcherVar attribute defined which will be used to read the client attribute that is passed to popup open event.use af:setPropertyListener from attribute to read the client attribute that is passed  and to attribute to set to a variable to use inside popup as shown in below popup code.

    <af:popup id="helpPopup" launcherVar="source"
                  contentDelivery="lazyUncached" eventContext="launcher">
          <af:setPropertyListener from="#{source.attributes.helpText}"
                                  to="#{viewScope.helpText}" type="popupFetch"/>
          <af:noteWindow id="nw1" inlineStyle="width:400.0px;">
            <af:panelGroupLayout id="pgl4">
              <af:outputText id="ot1" value="#{viewScope.helpText}"/>
            </af:panelGroupLayout>
          </af:noteWindow>

        </af:popup>

Screen will display like below


you can leverage same for opening popup on click of each row of adf table and pass data to popup depending on the row clicked on .


Tuesday, March 3, 2020

Jdeveloper 11g/12c Layout Hangs and does not compile project or workspace


After exhaustive use of Jdeveloper for debugging and development ,sometimes after opening the workspace of the project and when we try to build project compilation doesn't finish and at the bottom right of jdeveloper message comes forever saying "Scanning files.." .

this happens sometimes and all developers may not face issue .

Solution:

Go To C:\Users\XXXX\AppData\Roaming\JDeveloper\system12.2.1.3.42.170820.0914\o.ide folder .It will contain layout files as shown in below screenshot.


  1. Close your jdeveloper 
  2. remove all layout files or take a back up of it.
  3. open jdeveloper again 


Now jdeveloper layout will look like a fresh one and compilation will work faster as before.once you restart jdeveloper  all layout files will be regenerated automatically.


Wednesday, February 26, 2020

jdeveloper 12c Performance Boost

We often see that once you install jdeveloper 12c and start development of your application then IDE is very very slow .Follow below steps to improve Jdeveloper 12c performance

Step 1: Configure JVM settings in jdev.conf

Go To path   $MIDDLEWARE_HOME$/jdeveloper/jdev/bin/jdev.conf  and add below lines at the end of the file and save.

# optimize the JVM for strings / text editing

AddVMOption -XX:+UseStringCache

AddVMOption -XX:+OptimizeStringConcat

AddVMOption -XX:+UseCompressedStrings

# if on a 64-bit system, but using less than 32 GB RAM, this reduces object pointer memory size

AddVMOption -XX:+UseCompressedOops

# use an aggressive garbage collector (constant small collections)

AddVMOption -XX:+AggressiveOpts

# for multi-core machines, use multiple threads to create objects and reduce pause times

AddVMOption -XX:+UseConcMarkSweepGC

AddVMOption -DVFS_ENABLE=true

AddVMOption -Dsun.java2d.ddoffscreen=false

AddVMOption -XX:+UseParNewGC

AddVMOption -XX:+CMSIncrementalMode

AddVMOption -XX:+CMSIncrementalPacing

AddVMOption -XX:CMSIncrementalDutyCycleMin=0

AddVMOption -XX:CMSIncrementalDutyCycle=10


Step 2: Configure java memory settings in ide.conf file

Go To  path  $MIDDLEWARE_HOME$/jdeveloper/ide/bin/ide.conf and search for Xms and Xmx values and change it as below and save.this will significantly improve you jdeveloper speed.


# Set the default memory options for the Java VM which apply to both 32 and 64-bit VM's.

# These values can be overridden in the user .conf file, see the comment at the top of this file.

AddVMOption -Xms2048M

AddVMOption -Xmx4096M


Step3 :Disable Build on save Option

Go To Tools->Preferences->Code Editor->Save Actions


Step 4 :Remove Non required features

Go To Tools->features and i removed below which are not required generally.you can do more if it is not relevant to you.


Step 6 :Select default editor for jsff and jspx files.

By default jsff and jspx files open in design mode and hence it takes longer time for them to open.so to open it is source code do below

Go To Tools->preferences->File Types->Default editors (Tab)


Restart your Jdeveloper and enjoy the faster jdeveloper :)

Monday, February 24, 2020

Keep Scroll Position in ADF page/jsff


Requirement
usually we have long form in ADF jsff or jspx with many input fields tables etc on same page .Since fields are more we get vertical scroll bar .Now when user fill in all information on the page and scrolls down to click submit.If there are any errors in fields we show error message using below snippet.

 FacesContext ctx = FacesContext.getCurrentInstance();
 FacesMessage fm = new FacesMessage(FacesMessage.SEVERITY_ERROR, "Error .", "Please correct email address and confirm email address");
        ctx.addMessage(null,fm);


Now when we click OK page goes to top and scroll position is not maintained.


Solution :

just use an actionListener on submit button and the attribute partialSubmit="true" on the button or link.
due to this when click on submit  a partial submit will be executed instead of a full page reload.
In this case you would need to programmatically refresh components you want to refresh on click of submit  using   addPartialTarget(bindingofcomponent) in Java or the attribute partialTriggers="idofcomponent" on the components which should update because of that partial submit of submit button

Thursday, February 20, 2020

ADF -Rendering components based on other components selected values


Requirement: usually we come across this simple requirement where we want to display certain component on certain value selected by user on UI

E.g. I have drop down and based on selected value either I want to display inputText field or inputDate field
Usually developer will add the partial target on inputtext and inputdate field and will expect it to work with below code

<af:form id="f1">          
                <af:spacer height="100"></af:spacer>
                <af:selectOneChoice  autoSubmit="true" id="tsk1" label="Select value"
                                    unselectedLabel="--select--" binding="#{CustomBean.ctask}">
                    <af:selectItem label="Show input text" value="test1"></af:selectItem>
                    <af:selectItem label="Show input Date" value="test2"></af:selectItem>
                </af:selectOneChoice>
                <af:spacer height="30"></af:spacer>
                <af:inputText required="#{CustomBean.ctask.value eq 'test1'}"
                              rendered="#{CustomBean.ctask.value eq 'test1'}" partialTriggers="tsk1" id="inp1"
                              label="Input Field 1" binding="#{CustomBean.textBinding}"></af:inputText>
                <af:inputDate required="#{CustomBean.ctask.value eq 'test2'}"
                              rendered="#{CustomBean.ctask.value eq 'test2'}" partialTriggers="tsk1"
                              label="Input Field 2" binding="#{CustomBean.dateBinding}"></af:inputDate>
                <af:spacer height="30"></af:spacer>
                <af:button text="submit"></af:button>          
        </af:form>


But this doesn’t work and my input text component doesn’t show up as we have applied render condition and not visible condition on inputtext and inputdate component .


Reason for this is if you want to render component at a runtime then you need to refresh parent layout component so I added panelGrouplayout and partial trigger on the same and code will look like below


<af:form id="f1">
            <af:panelGroupLayout partialTriggers="tsk1">
                <af:spacer height="100"></af:spacer>
                <af:selectOneChoice  autoSubmit="true" id="tsk1" label="Select value"
                                    unselectedLabel="--select--" binding="#{CustomBean.ctask}">
                    <af:selectItem label="Show input text" value="test1"></af:selectItem>
                    <af:selectItem label="Show input Date" value="test2"></af:selectItem>
                </af:selectOneChoice>
                <af:spacer height="30"></af:spacer>
                <af:inputText required="#{CustomBean.ctask.value eq 'test1'}"
                              rendered="#{CustomBean.ctask.value eq 'test1'}" partialTriggers="tsk1" id="inp1"
                              label="Input Field 1" binding="#{CustomBean.textBinding}"></af:inputText>
                <af:inputDate required="#{CustomBean.ctask.value eq 'test2'}"
                              rendered="#{CustomBean.ctask.value eq 'test2'}" partialTriggers="tsk1"
                              label="Input Field 2" binding="#{CustomBean.dateBinding}"></af:inputDate>
                <af:spacer height="30"></af:spacer>
                <af:button text="submit"></af:button>
            </af:panelGroupLayout>
        </af:form>

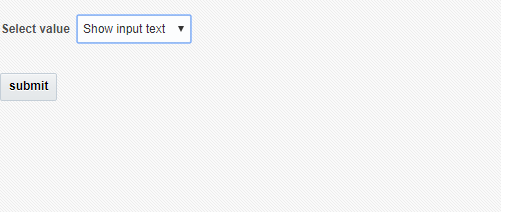
And now my input text and input date renders at runtime as below


This works in 12c but in 11g you will need refresh the panelgrouplayout programmatically in value changeListener of select one choice drodown using below statement

AdfFacesContext.getCurrentInstance().addPartialTarget(valueChangeEvent.getComponent().getParent());

Tuesday, February 18, 2020

Oracle ADF 12c -Wrapping long text of af:link/af:outputtext

Requirement -Wrapping long text of any link so that it fits into small layout in ADF 12c.

Below code snippet for af:link works perfectly

<af:link text="Test for wrapping link with long text to fit into small layout"
                         inlineStyle="word-wrap:break-word;display:inline-block;width:150px;white-space: normal;"></af:link>

Please note that you need to give width according to your requirement and space available in layout.

same works for wrapping  the af:outputtext 

<af:outputText value="Test for wrapping link with long text to fit into small layout"
                         inlineStyle="word-wrap:break-word;display:inline-block;width:150px;white-space: normal;"></af:outputText >

image.png

Monday, February 17, 2020

Change the Jdeveloper JDK version


if you want to change the JDK version used on our local jdeveloper Two things need to be done

  1. Change the jdk version of Jdeveloper for compilation
  2. Change the JDK version of Integrated weblogic servers.

Changing the JDK version of jdeveloper

  1. Go to MIDDLEWAREHOME\jdeveloper\jdev\bin
  2. open jdev.conf in notepad
  3. edit below line to point to new JDK version and save file
SetJavaHome C:\Oracle\Middleware\jdk1.7.0_79

restart jdeveloper and go to help-->about-->version tab to see new jdk version as shown in below screenshot

Changing the JDK version of Integrated Weblogic server


  1. go to default domain folder of local weblogic server .e.g path C:\Users\XXXX\AppData\Roaming\JDeveloper\system11.1.1.9.40.66.73\DefaultDomain\bin
  2. Open setDomainEnv.cmd (Windows)/setDomainEnv.sh file (Linux)(.cmd for Windows)
  3. replace the SUN_JAVA_HOME and JAVA_HOME with new JDK version path as shown below
#set SUN_JAVA_HOME=C:\Oracle\Middleware\jdk160_29
set SUN_JAVA_HOME=C:\Oracle\Middleware\jdk1.7.0_79

if "%JAVA_VENDOR%"=="Oracle" (
set JAVA_HOME=%BEA_JAVA_HOME%
) else (
if "%JAVA_VENDOR%"=="Sun" (
set JAVA_HOME=%SUN_JAVA_HOME%
) else (
set JAVA_VENDOR=Sun
set JAVA_HOME=C:\Oracle\Middleware\jdk1.7.0_79
)
)

restart local weblogic server .While server is starting the new JDK path will show in logs as below


Identify ADF Skinning css style class


We often have requirement to customize the ADF component style class For example ,customize font color and size of panelbox header.

When we inspect the panelbox header in browser by doing inspect element on component we get classes  as shown in below screenshot which are not useful and not what developer is looking for .


Add below context parameter in web.xml file and set param-value to true

<context-param>
        <description>If this parameter is true, there will be an automatic check of the modification date of your JSPs, and saved state will be discarded when JSP's change. It will also automatically check if your skinning css files have changed without you having to restart the server. This makes development easier, but adds overhead. For this reason this parameter should be set to false when your application is deployed.</description>
        <param-name>org.apache.myfaces.trinidad.DISABLE_CONTENT_COMPRESSION</param-name>
        <param-value>true</param-value>
  </context-param>

Run the application again and see how the actual style class shows up as below.Now you can use these in ADF skinning css file to change the font color ,size etc.


Sunday, February 16, 2020

ADF PanelBox CSS customization


Requirement:Customize ADF panelbox css to have different open and closed panelbox icons and background color,border etc

In adf when we use panelbox with detault css it looks like below

<af:panelBox  text="Panel box Header 1" inlineStyle="width:400px;padding-left:20px;">
    
     <af:outputText value="Panel box content" ></af:outputText>
   </af:panelBox>


Customize the css as below and create customPanelbox style class as below


.customPanelBox af|panelBox::header-start:core:default {
    border-top: 1px solid #BFBFBF;
    border-left: 1px solid #BFBFBF;
    display: none;
    background-image: none !important;
    background-color: #ffffff !important;
    padding-left: 0px !important;
}

.customPanelBox af|panelBox::header-center:core:default {
    border: 1px solid #BFBFBF;
    border-bottom: none !important;
    background-image: none !important;
    background-color: #ffffff !important;
}

.customPanelBox af|panelBox::center:core:default {
    background-image: none;
    border: 1px solid #BFBFBF !important;
    background-color: #ffffff !important;
    padding-left: 0px !important;
    padding-left: 0px !important;
    padding-right: 0px !important;
    border-top: none !important;
    border-bottom: none !important;
    padding-left: 24px !important;;
    padding-bottom: 24px !important;;
    padding-right: 24px !important;;
}

.customPanelBox af|panelBox::footer-start:core:default {
    border-top: 1px solid #BFBFBF;
    border-left: 2px solid White;
    background-color: #ffffff !important;
    background-image: none !important;
    width: 0px !important;
    height: 0px !important;
}

.customPanelBox af|panelBox::footer-center:core:default {
    border-top: 1px solid #BFBFBF;
    background-color: #ffffff !important;
    background-image: none !important;
    width: 0px !important;
    height: 0px !important;
}

.customPanelBox af|panelBox::footer-end:core:default {
    border-top: 1px solid #BFBFBF;
    border-right: 0px solid White;
    background-color: #ffffff !important;
    background-image: none !important;
    width: 0px !important;
    height: 0px !important;
}

.customPanelBox af|panelBox::header-text {
    font-size: 22px !important;
    color: #000000 !important;
    font-weight: 300 !important;
    padding-left: 0px !important;;
}

.customPanelBox af|panelBox::header-end {
    background-image: none !important;;
    display: none;
    background-color: #ffffff !important;
}

.customPanelBox af|panelBox::disclosed-icon-style {
    background-image: url("../images/Darrow.png")!important;
    padding-left: 48px;
    padding-top: 24px;
    padding-bottom: 24px;
    background-repeat: no-repeat !important;
    background-position: center;
    background-color: #ffffff;
    align: right !important;
    background-size: 20px 11px !important;;
    width: 20px !important;
    height: 11px !important;
}

.customPanelBox af|panelBox::undisclosed-icon-style {
    background-image: url("../images/UpArrow.png")!important;
    padding-left: 48px;
    padding-top: 24px;
    padding-bottom: 24px;
    background-repeat: no-repeat !important;
    background-position: center;
    background-color: #ffffff;
    align: right !important;
}

.customPanelBox af|panelBox::header-element {
    font-size: 22px !important;
    color: #000000;
    font-weight: 300 !important;
}
The UI code will look like below
 

The New panel box for which customPanelBox style class is applied will look like below and the panelbox for which we have not applied any style class that will continue to look like default adf panelbox